Ink Photoshop Plugin
Features:
NK Panel Overview

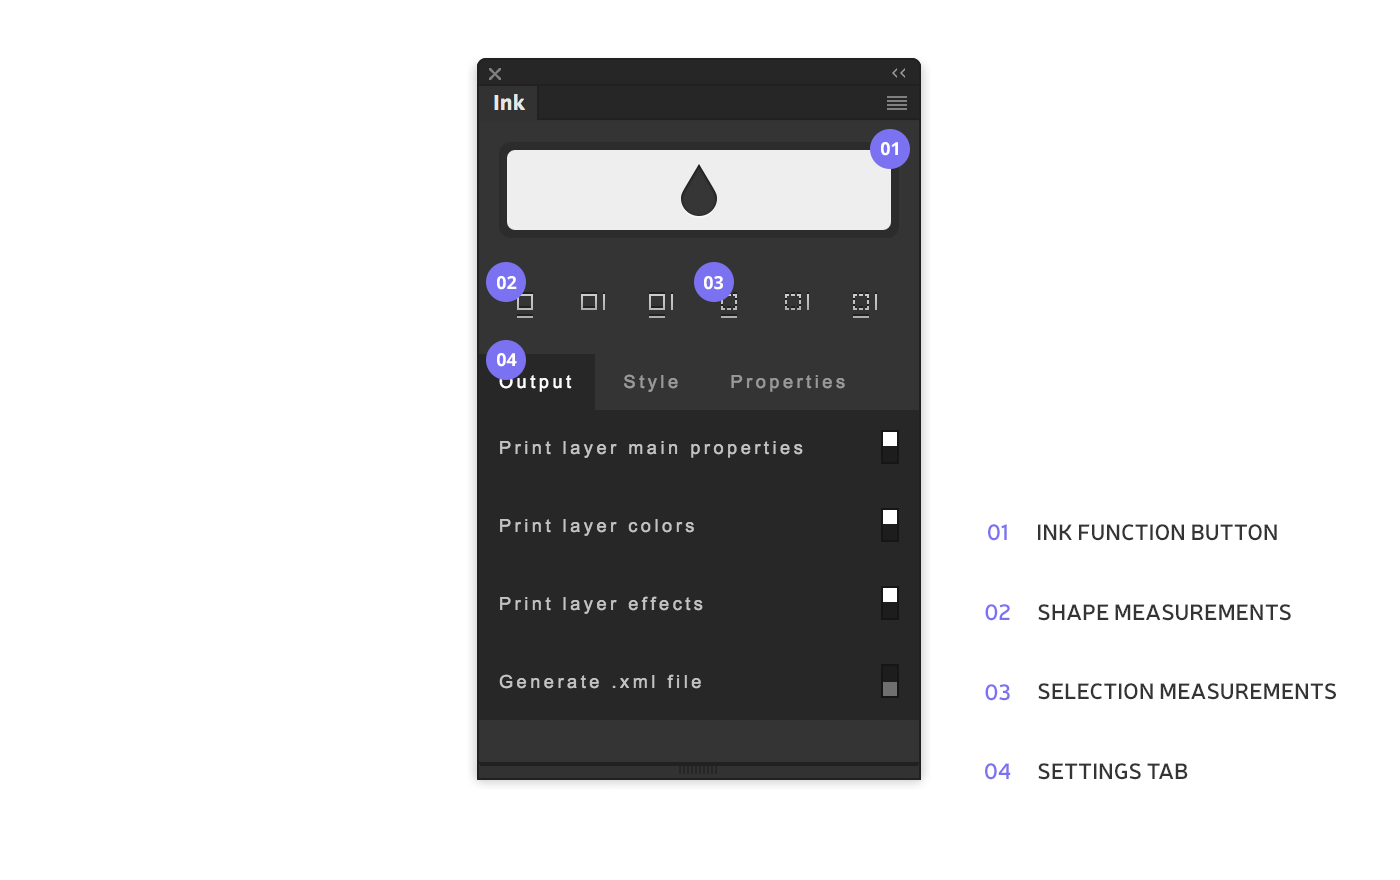
The INK function button (01) generates measurements and specs out of layers that are currently selected.
- The Shape measurement buttons (02) allow you to measure the selected layer’s width, height, or both properties out of selected layers.
- The Selection measurement buttons allow you to create measurements out of a selection. Use the Rectangular Marquee Tool (M) to create a selection, and press one of the three buttons to create a measurement ruler for width, height, or both. I use this function a lot to document spacing between elements.
- Settings Area
- Let’s now focus a little bit on the Settings Area located at the bottom of the plugin. It contains three different tabs. Output, Style, and Properties.
- The Output tab contains a set of options to control the specs output. Basically, it controls what happens after clicking the INK function button (01). We will go through a few of these options a bit later in this tutorial.
- The Style tab has control over the specs’ visual output, and it looks like this.

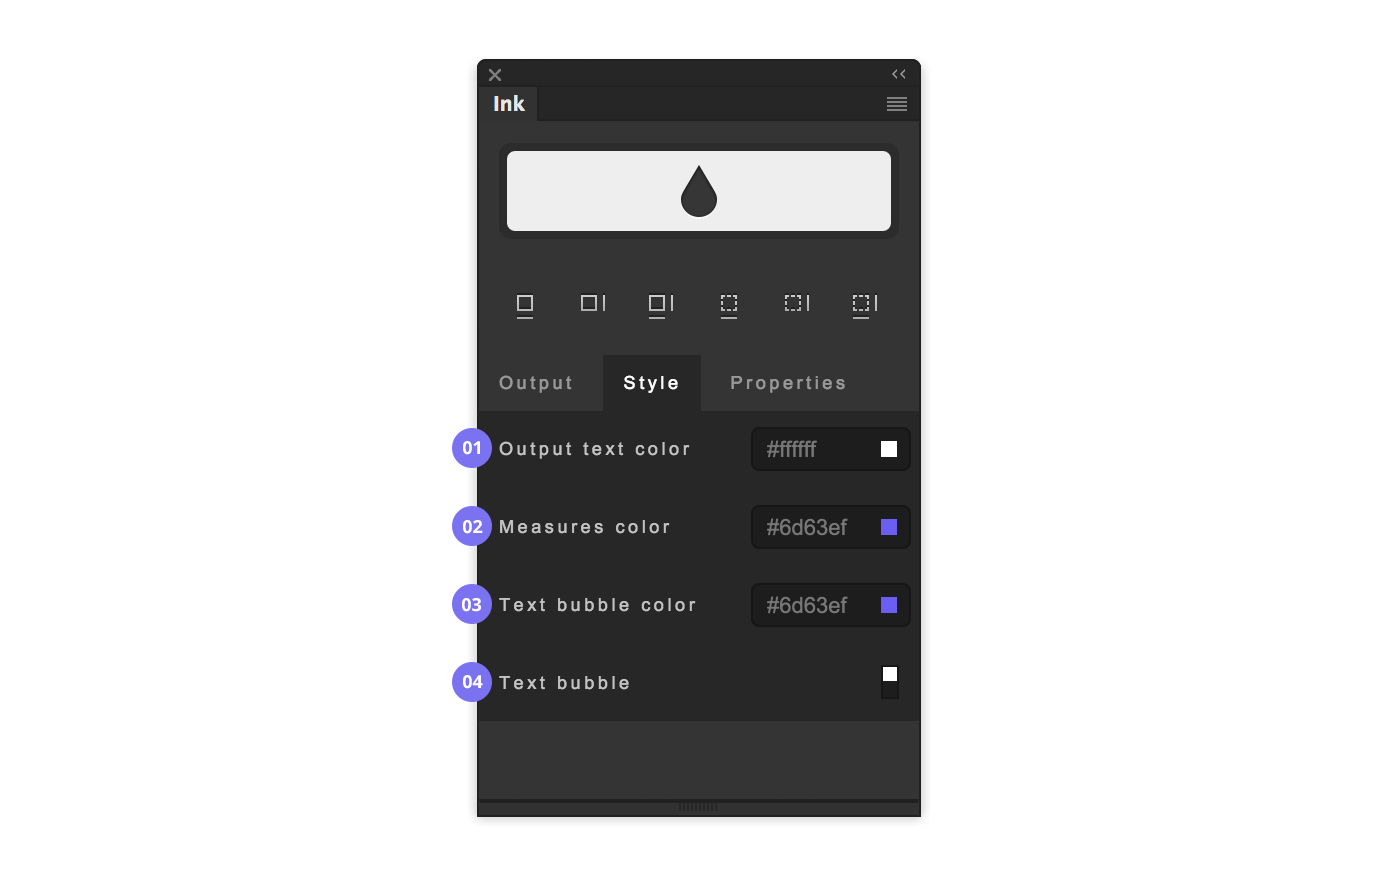
- You can control measurement rulers color (02), and specs text color (01).
- By default, specs are contained in bubbles. You can get rid of them by switching off the “Text Bubble” option (04) or you might want to change their color (03).
- The Properties tab manages the output’s Color format (hex or CSS-style RGBA) (03). Please note that hex is supported only on solid colors at the moment.
- This tab is also handy to adjust text and measurement rulers’ size according to your document resolution.
- For example, if you are working @1x, you might want to keep the Text size around 10px, and the Measurement rulers stroke around 1px.
- If you are working @2x resolutions, it’s probably a good idea to double those values for better readability, and so on.


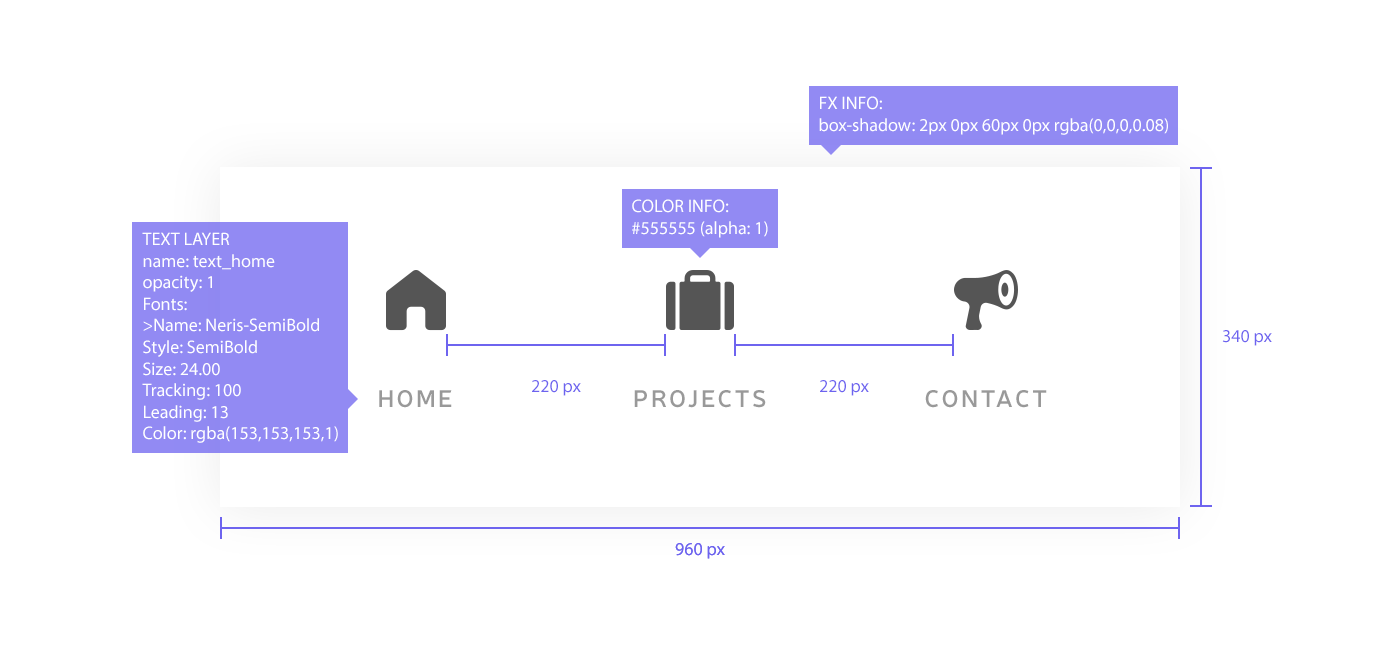
- A practical example.
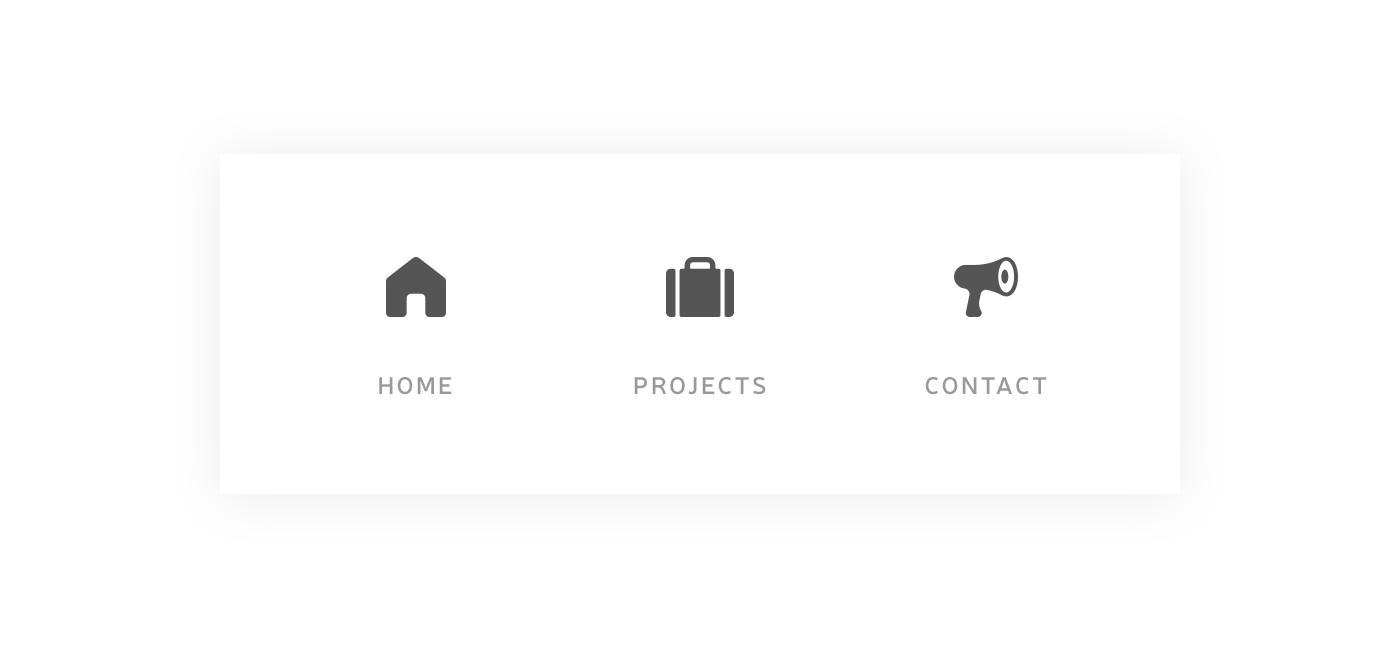
- Let’s see how INK works with a simple example: We want to create specs out of some elements of this simple menu.

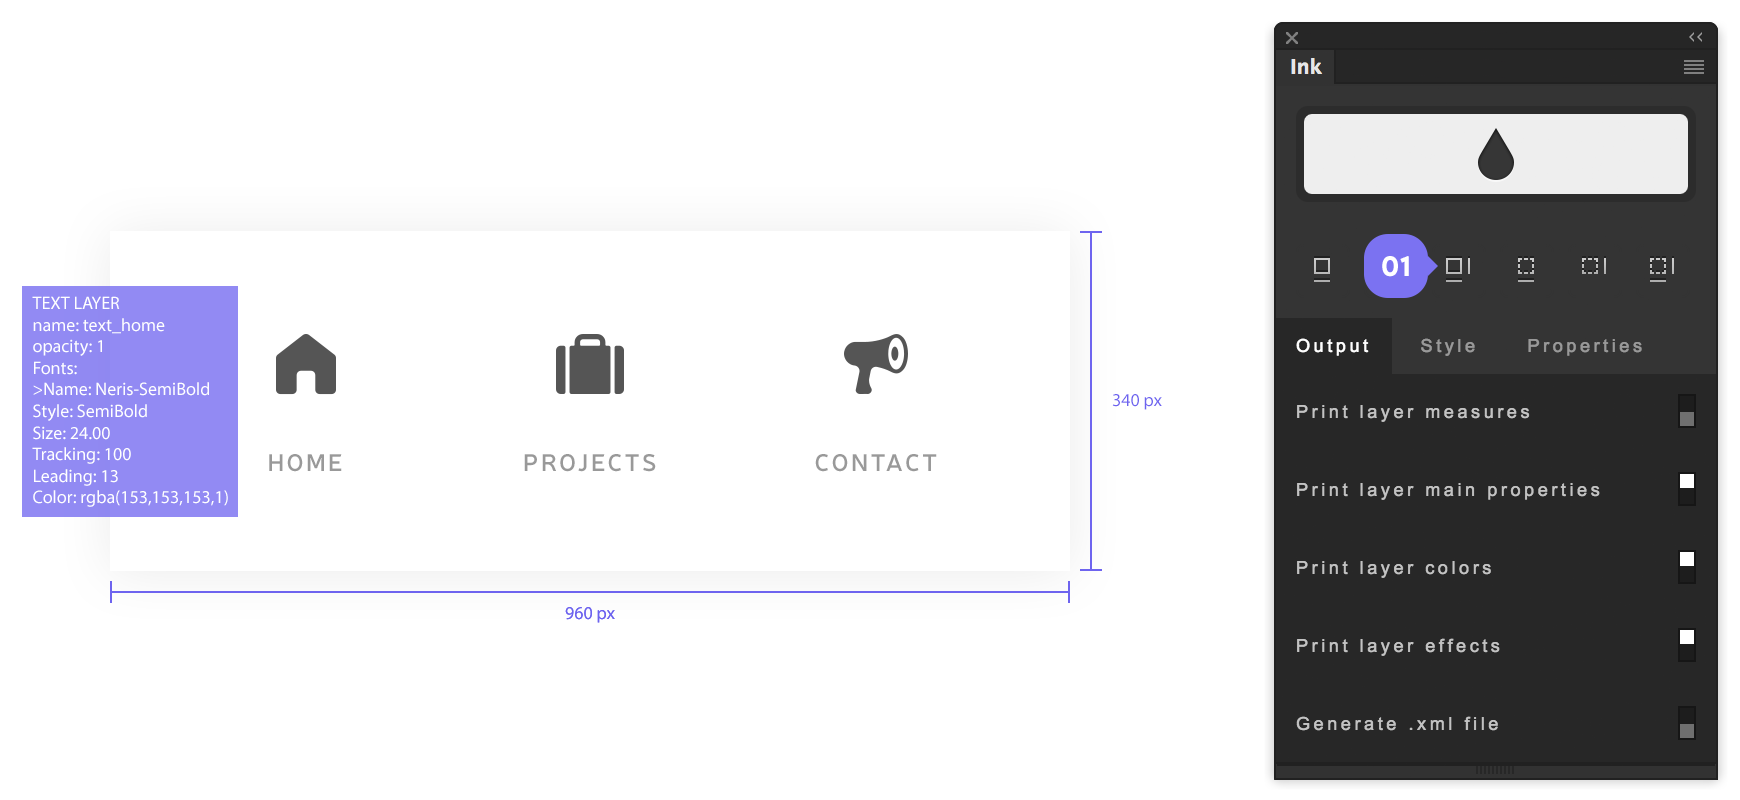
- Documenting Layers
- To begin, I want to generate specs for those text labels. Let’s select one of the three, and, since I don’t want to create the measurement rulers for these elements, I will turn off “Print layer measures” from the Output tab, and then hit the INK function button.


Measuring shapes
Now I want to measure the width and height of the menu background. I need to select the right layer and hit the 3rd icon of the shape measurements panel (01). After a little bit of crunching, the result will look like this.

Documenting Layer Effects
But wait! I forgot that I need to also create specs for that background with a fancy diffuse shadow.
I think that documenting absolutely everything out of your layers can be counterproductive. Some details might slip under the radar!
That’s why, in this case, I will turn every option out of the Output panel, except for “Print layer effects” (01), and then press the INK function button.


Selection based measurements
I also want to measure the distance between those three icons. The best way to accomplish it with INK is to create a precise selection using the Rectangular Marquee Tool, and then press one of the three buttons on the right side of the selection measurement area. I want to measure the horizontal space between those icons, so I will press the first one. (01).


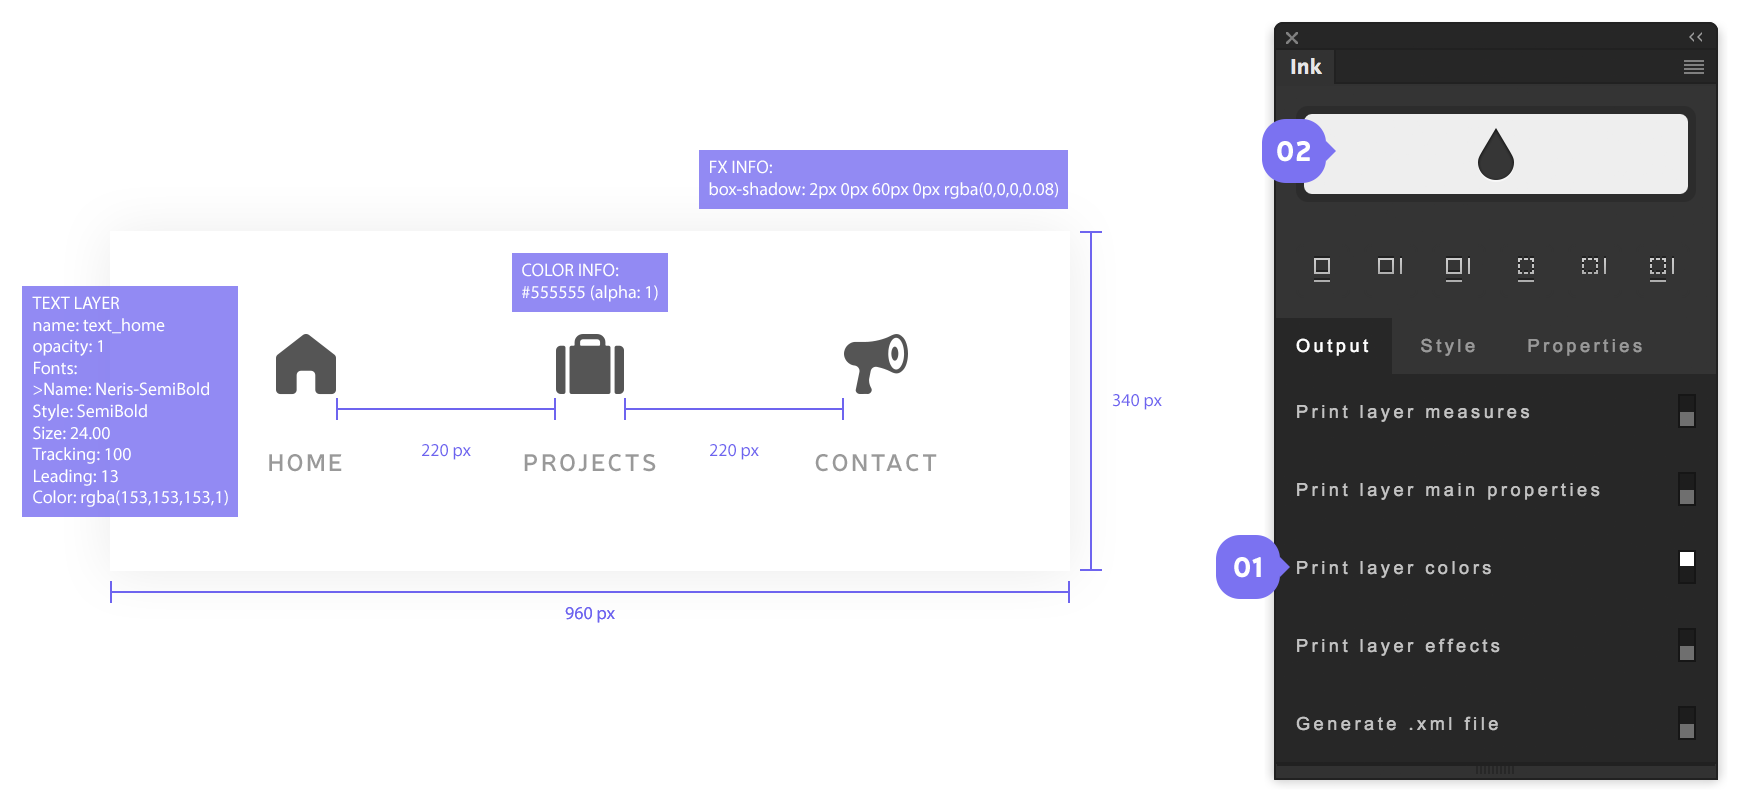
Documenting Layer Colors
Let’s say that I want to create a specification object exclusively for the color of those icons.
Since I don’t want to output any other information, I will turn all the Output tab options off, except for “Print layer color”, and then hit the INK function button (02).

A bit of extra manual touch never hurts.
Just to make sure that every spec bubble points to the right object, I usually take a bit of extra time to manually add some small arrows. Hopefully, this will be a feature of INK soon!
The final result looks like this. Clean enough?

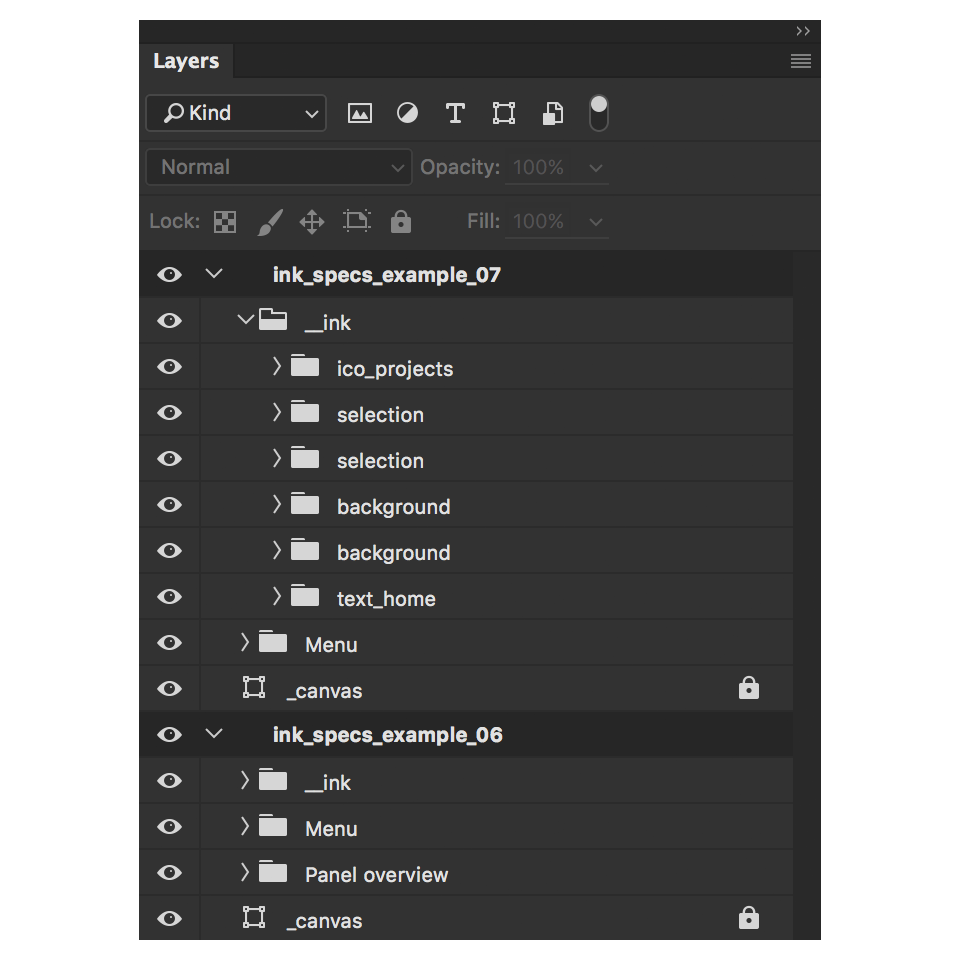
How / where are all these specs stored in my document?
If you look at your Layers panel after creating specs with INK, you will notice a new folder called “__ink” at the top of every Artboard that contains specifications.
To easily identify elements, every spec block inside “__ink” is labeled after its target Layer. This is how my Layers panel looks like after creating this tutorial.

Zip File Password is : extras.gidstudio
