After Effects is a part of Adobe’s Creative Cloud and is well-known among VFX and 3D artists, motion graphics designers, and animators for the wide range of tools it offers that can be tailored to suit a wide range of tasks, from simple lower-thirds titles and texts to complex 3-dimensional stereo compositing for movies. When you add a video to the After Effects workspace or create a composition, the tools on the tool panel at the very top of the After Effects program window become available to you.
Adobe software, such as Photoshop, is well-known for its powerful editing capabilities, and After Effects includes many of the same tools you are familiar with. There are multiple clickable buttons in the tools panel that allow you to switch between the various tools while also visually confirming whatever tool you are currently using. The pop-up menus for many of these tools let you choose from a variety of options within that tool, such as several basic shapes for shape and mask layers.
{tocify} $title={Table of Contents}
After Effects Tools Panel
List of After Effects Tools
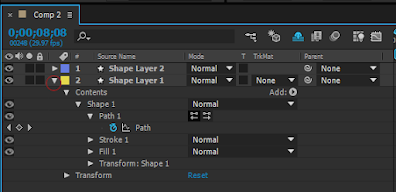
Pen Tool/Masks
Using the pen tool, you may draw a line or a form by individually drawing peaks. These tools may be used for both concealing a specific area of an even layer and drawing new shapes. You might say that these are the most fundamental motivations for using this tool, although you can also draw and edit pathways using it.
Using these routes, we can command the layer to move along with the layer, and we can even use them to limit our text to a single letter if we choose. It’s also possible to register the scribbled stroke effect to an even layer that has a path and uses an alterable line along the route to bring a form layer’s stroke built-in to life.
There are several ways to use the pen tool in rotoscoping, artwork creation, and achieving a wide range of new text effects, such as sinuous motion or handwriting imitation.
Adjustment Layer
Similar to compositions, they give a faster and more logical technique than more complicated procedures, although they are not entirely necessary. In the same way that solid layers may be used to affect other levels, these layers can only be used to alter the layers below them. When this layer is put atop other layers, the effects it has recorded are applied to the layers as if it were a blank canvas. This layer can be hidden, its dimensions may be specified, and much like the solid layer, the adjustment layer’s transform characteristics can be updated, affecting the whole area it covers. Adjustment layers are ideal for situations in which you want to register an effect but don’t want to utilize the pre-comp tool.
Cameras
When working in 3D, it is very important to give a scene a unique perspective. Layers of camera techniques are used to create a composition that mirrors the optical camera’s perspective. Cameras may be used to enhance your filmmaking talents if you move and position your camera correctly. It is possible to make the 2D series more effective by moving between different parts of the frame, even if cameras may theoretically be used as a 3D layer.
Shape Layers
The best place to begin is with the form layer. If you use the pen tool or a predefined shape provided by After Effects, you may create a shape layer, which is a two-dimensional, homogeneous object.
A form’s stroke and fill (the shape’s interior area inside its outline) may be customized using shape layers, as can little features like the roundness of a corner. They’re ideal for quickly making uniform forms, intricate patterns, and two-dimensional art because of their great customization.
Shape layers, on the other hand, need a lot of processing power and should be utilized sparingly. The solid layer may be a preferable option for those who need a simple task done.
Solid layers are useful, but they aren’t sophisticated enough to need a lengthy explanation. Color, dimensions, and typical 2-dimensional transform attributes like scale, position, and rotation are all you get with them; they’re just a shape layer.
Nesting Compositions/Precomposing
As your project becomes more complex, you’ll learn that it might be difficult to control. Prewriting is an essential part of project planning since it allows you to break down your work into manageable chunks.
Pre-comp may be thought of as a composition in technical terms. Pre-compositions, on the other hand, are a kind of composition that aids in the development of your project’s overall composition.
To precompose a group of layers, select the layers to be precomposed, then right-click and choose Precompose from the context menu. If you do this, they’ll be in their own composition that you may change like a layer.
Track Mattes
Additionally, the pen tool is crucial in the creation of track mattes. A track matte uses one layer to mask another layer based on its luminosity or visibility. In the case of Alpha Matte, for example, the layer will only be visible in the non-transparent areas of the layer above it. The layer’s emergence would be limited to just the transparent areas of the layer above it if Alpha Inverted Matte was used. A Luma Matte, on the other hand, would limit the bottom layer’s emergence to the bright areas of the top layer, rather than the whole surface.